
Well,I have no ideas actually before I start to do this e-wallpaper and I just keep playing with the brushes that I have In my Adobe Photoshop CS4 extension version.When I open up a cloud-like shape brush and I start to think, "Why must I use the cherry blossom scene as the background and add other things on it?","Why can't I add my reference images into the special shape brush?".After that I start to add the coming ideas into the e-wallpaper and one thing in my mind is that I want it to be "less is more and more is less". I had done it as the following :
First, open a new file with A4 size and name it as "WongWeiTing_wallpaper".Don't forget to set it as 72 resolution.

Fill up the new canvas with black colour.

Create a new layer and name it as "Background brush".Apply the cloud-like shape brush onto the certain layer by using Brush tool.

Click "Ctrl + T" to adjust the cloud-like shape brush as big as the canvas and place it at center. Right-click on the layer thumbnail >> Blending options >> Gradient overlay select light spectrum.

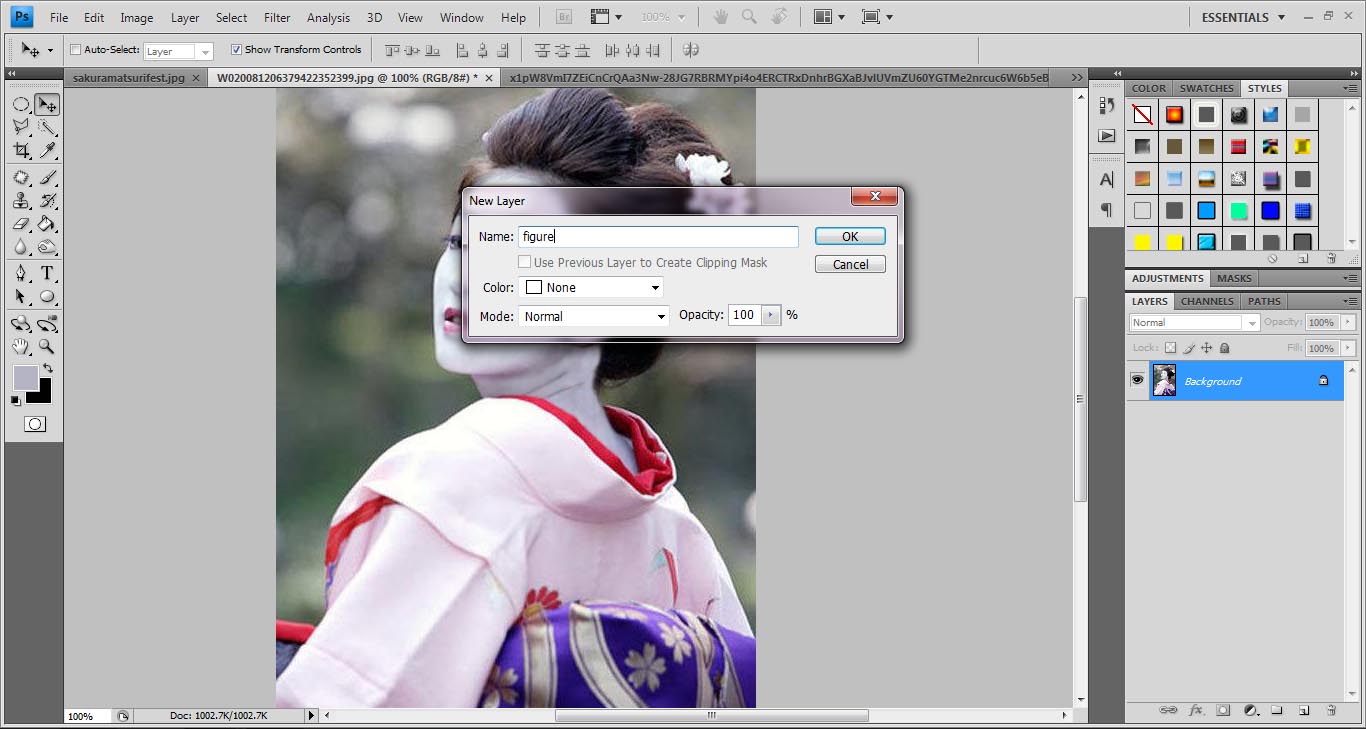
Open the image of the Japanese women.

Double-click on the layer thumbnail to unlock it and make it as layer and name it as "Figure".Apply "Image >> Auto tone" and "Auto contrast" to the "Figure" image and also refine the image with Blur tool to smoothen the white foundation on figure face. I also use the Clone Stamp tool to retouch the white colour make-up on the figure's ear and neck.
Using Quick Selection tool to select out the figure from background.Right-click >> Feather >> feather radius = 3 pixels to make the edge of the selected image look smoother.

Select inverse and delete the background.

Drag the figure image into the WongWeiTing_wallpaper canvas. Click "Ctrl + T" to enlarge and place it at the suitable place.Add a layer mask onto the figure image and use Eraser tool to erase the unwanted part. [Adding layer mask before erase the image will let us only erase the unwanted part on the layer mask. We can get back the original complete image by delete the layer mask only.]

Open the dancers image and drag it into the WongWeiTing_wallpaper canvas. Place it at the right side behind the figure and name it as "background dancer" .

* I feel the background brush part is too light so I change the gradient overlay to medium spectrum.
Set the background dancer image to Hard light mode and opacity 50%. Ctrl + click on the layer thumbnail of background brush to load selection of the cloud-like shape. Back to the layer of background dancer and click on the add vector mask button to hidden the unwanted part under the layer mask.

The result will be like this.

Open the cherry blossom tree image and drag it into WongWeiTing_wallpaper canvas.Name it as "background sakura 1". "Ctrl + T" to apply free transform, enlarge it to can cover the area of background brush.

Repeat the steps just now that we use to hidden the unwanted part of background dancer under vector mask [Ctrl + click on the layer thumbnail of background brush to load selection of the cloud-like shape.Back to the layer of background sakura 1 and click on the add vector mask]. Set the opacity to 40% and change to soft light mode.

Open the white cherry blossom image. Copy and paste it into WongWeiTing_wallpaper canvas.Name it as "background sakura 2". "Ctrl + T" to apply free transform, enlarge it to can cover the area of background brush and place it at the suitable place.

Again,load selection of the cloud-like shape and add vector mask to the background sakura 2 layer to hidden the unwanted part.Change the blending mode to soft light.

Open the lantern image and this time I use Quick Mask mode to crop the image that I want. Press Q to enter Quick Mask mode and use Brush tool to select the part that I want.It would look like this.

After selection,press Q again to exit Quick Mask mode. There will be a selection of the inverse parts and click on "Add a pixel mask" then "Inverse". The selection of wanted part will appear. Then, using "Quick Selection tool >> subtract from selection" to clear the selection of some unwanted part that being selected just now.

Feather >> feather radius = 3 pixels to refine and make the edge look smoother. Drag the selection of lantern to the WongWeiTing_wallpaper canvas and place it nicely in suitable place and name the layer as "lantern".

Change the blending mode of lantern layer to hard light. Load selection of the cloud-like shape and add vector mask to the lantern layer to hidden the upper part of lantern that exceed the cloud-like shape under layer mask. The lantern was too light so I copy the layer by clicking Ctrl + J to make the lantern look nicer.

Then, open the love-shape cherry blossom image and I use Quick Selection tool to select the love-shape cherry blossom from it background. Feather >> feather radius = 3 pixels to refine edge.

Drag the selected part into WongWeiTing_wallpaper canvas and place it as suitable place and name it as "cherry blossom 1"

Open another cherry blossom image and similarly I use Quick Selection tool to select the part that I want.Feather >> feather radius = 3 pixels to refine edge.

Drag the selected part into WongWeiTing_wallpaper canvas and place it as suitable place and name it as "cherry blossom 2"

Ctrl + J to copy the "cherry blossom 2" layer and Ctrl + T to enter free transform. Reduce the size of the cherry blossom and place it nicely. Right-click on layer thumbnail >> blending options >> drop shadow to both cherry blossom images .

Lastly, using Horizontal Type tool to add text on the E-wallpaper and change the blending options to apply different styles on the text that I have typed. E-wallpaper finish!

The final output :
 |
| E-wallpaper done by me-- WongWeiTing |
Nice Design!
ReplyDeleteThanks, Madam Lydia...=)
ReplyDelete