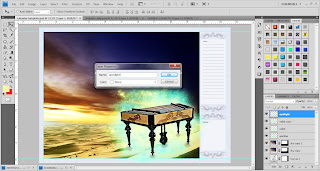
Open the calender template, load the “Desert” stock image into Photoshop, copy and paste the entire image onto calender document, position it at bottom of calender.
Name the new layer as “Desert”, add a layer mask onto it. On the layer mask, use the “Mist Brush set” erase the top part of the image.This will form a nice misty effect for the image and make it easier for the layer blending later on.
Duplicate this “Desert” layer once and on the duplicated layer, go to filter >> blur >> gaussian blur >> 2.1 pixels.
Change the blending mode of the duplicated layer to “Screen” and drop its opacity to 70%, you will have the following effect:
Adjust Color Balance, Curves, and Levels to make it more contrast.
Load the “Sunset Sky” image into Photoshop, copy and paste it onto our document and name this new layer as “sky”, resize and position it as shown below:
Add a layer mask to this sky layer, on the mask, use a soft round brush to gently erase the bottom part of the sky layer.
Add the following two adjustment layers to the sky layer, make sure to tick “use previous layer as clipping mask” option.
Color Balance :
Curves :
Then duplicate the original Sky layer once and drag it to the top. On the first duplicated sky layer, apply motion blur >> angle = 0 , 45 pixels .
After applying the motion blur filter, duplicate this layer once and change the duplicate layer’s blending mode to “Hard light”
Open the image of dulcimer, duplicate it and apply Filter >> Others >> High Pass = 10 pixels and set its blending mode to overlay to make the image look clearer.
Merged all layers and use Magic Wand Tool to select the image out of its background. Feather >> feather radius =3 pixels .
Drag it into calender document and name it as "dulcimer".
Ctrl + T to access Free Transform, hold down Alt and Shift to transform the dulcimer to make it more real.
Add a layer mask on it and erase some part of dulcimer stand to let the dulcimer seem like down to the desert. Create a new layer name as shadow and use soft brush with black color to draw some shadow behind the dulcimer stand,adjust it opacity to 20 %.
Create a new layer called “Sparkle” under dulcimer layer.Load the “Star Brush set” and use it to paint around the dulcimer to create some sparkling effect
Duplicate the “Sparkle” layer once, and apply Radial Blur .
Name this layer “Radial” and set its blending mode to “overlay” and duplicate it one more and Ctrl + T to adjust the position of its.
Create a new layer on top of all layers, name it as "spotlight". Then, use Pen Tool >> Shape layers to frame a triangle-like shape from upper-left corner.
Right-click >> make selection and feather it as 55 pixels. Shift + Ctrl + I to select inverse, rasterize layer and use Eraser Tool to erase the selection's edge to make the edge smoothen. Set its blending mode to overlay and add a layer mask to erase the part that cover dulcimer.
Drag the musical notes image into the document and name it as musical note 1.Place it as suitable place and set its blending mode to Screen. Then, open another musical notes image and select it out of background. Drag it into calender document and place it nicely. Set its blending mode to Linear Burn.
Adjust the curves and color balance for dulcimer and merged the layers up to make sure that the action only apply to dulcimer layer only.
Lastly, use Horizontal Type Tool to add date and month onto calender. Holidays and name also added. Change its blending mode to get different effects.Calender finished!~
This is the outcome :


No comments:
Post a Comment